This chapter describes how to configure TP-Link Omada Controller and EAP AP with a software version lower than 4.0.
Before proceeding further with the configuration, you need to have Wi5stars with a domain and a gateway as described in Adding a New Gateway.
The prerequisites required for configuration are:
Download the Omada controller from TP-Link official website: https://www.tp-link.com/it/support/download/eap-controller/#Controller_Software
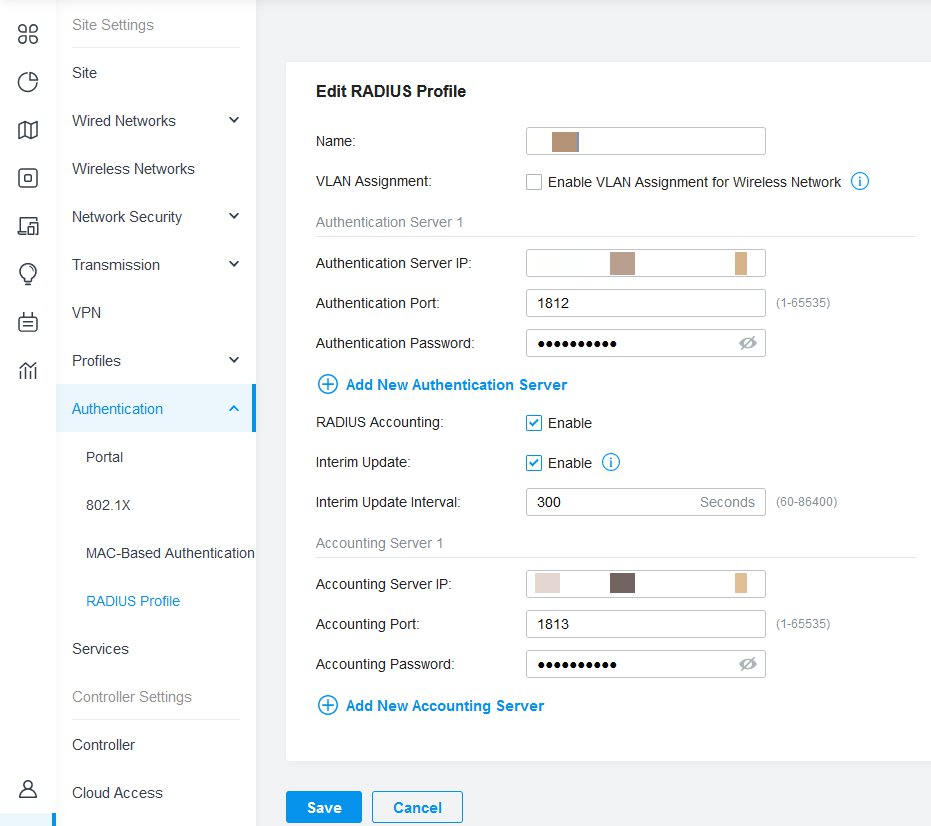
Access the controller and click on Authentication – RADIUS Profile
Click on Create New RADIUS Profile
Complete as follows:
In order to add the Secret you need to get it from your Wi5stars as described in the Radius Secret paragraph.

From the contextual menu on the left, click on Wireless Networks
Select Create New Wireless Network
Complete as follows:
Save
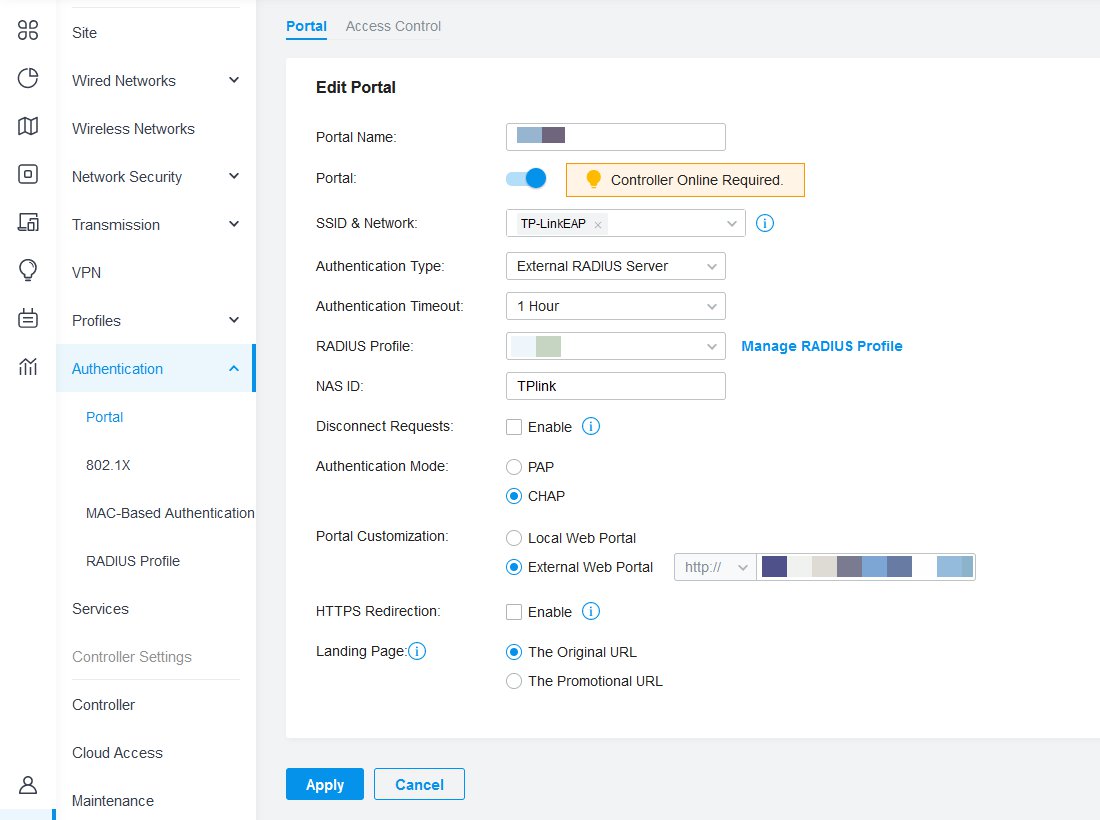
From the contextual menu on the left, click on Authentication>Portal
Click on Create New Portal
Complete as follows:
Click Apply
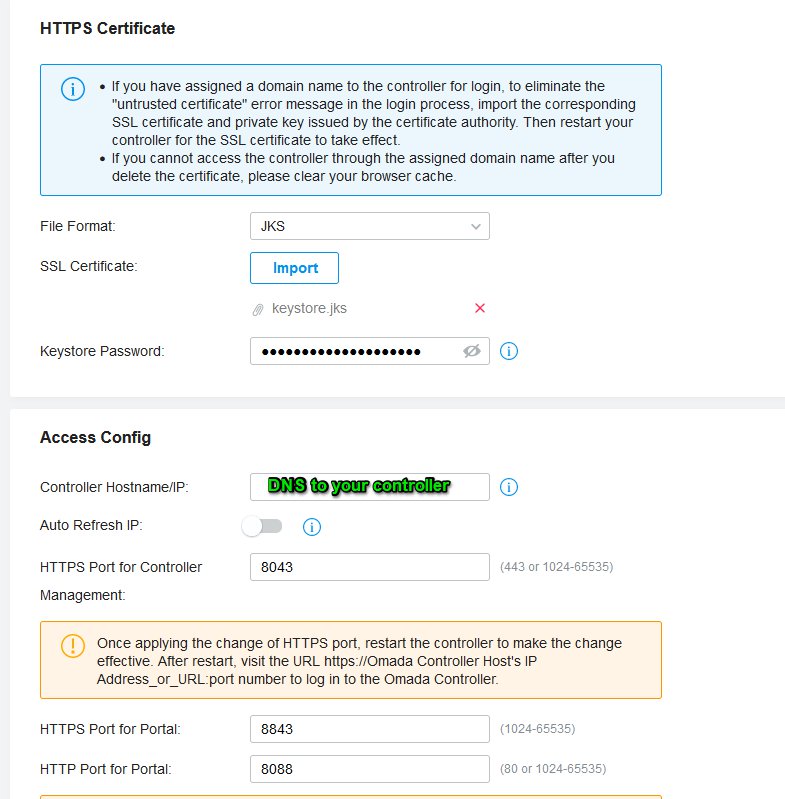
From Access Config section, set in the Controller Hostname/IP field the DNS that point to your controller. To complete the procedure for HTTPS authentication, select Controller>HTTPS Certificate from the contextual menu on the left. Upload your valid certificate, in the requested format, for your hostname nearly configured.
Please be sure that your certificate is valid for your hostname and the hostname is correctly pointed to your controller IP, (Wi5stars must reach your controller via HTTPS port with a valid hostname and certificate), otherwise the authentication via HTTPS will not work
TP-Link Omada Software Controller has a walled garden entry limitation. So, you may face some problems getting more than one social login or payment system running.
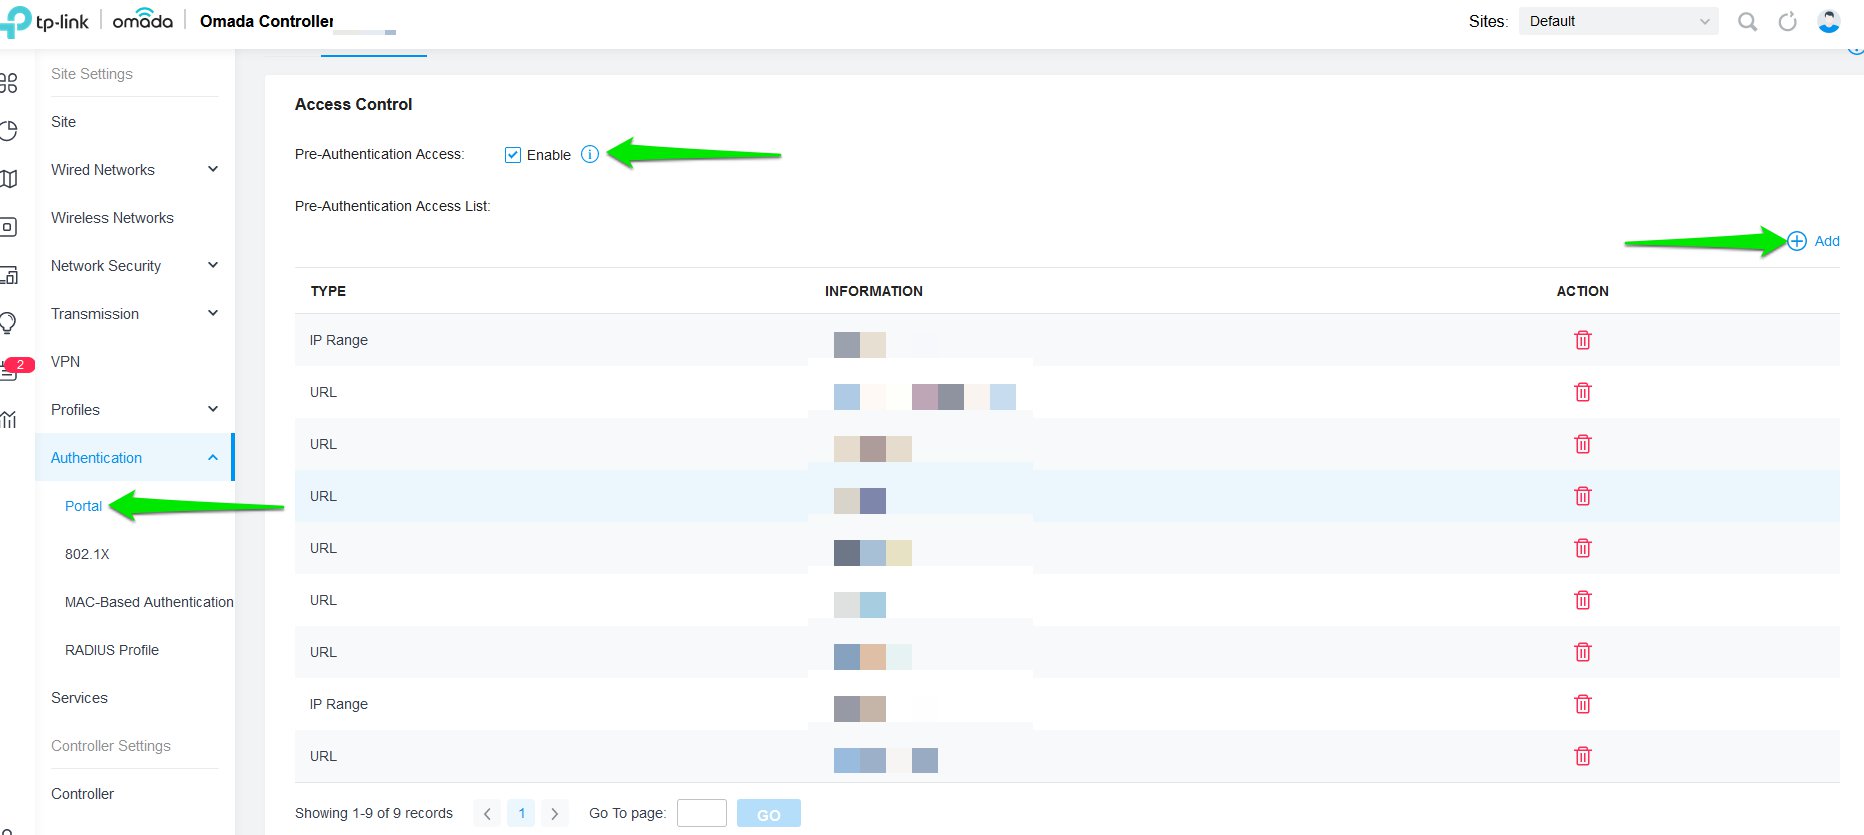
From the contextual menu on the left, click on Authentication>Portal
From the Access Control section enable Pre-Authentication Access and click on the Information icon button.
Click Add in order to add your Walled Garden
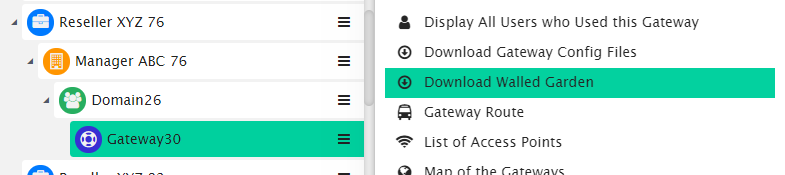
To know the accurate and relevant Walled Garden you need to add one by one, access your Wi5stars platform and click the contextual dropdown menu of your gateway. Select Download Walled Garden to get a .txt file with your accurate walled garden list as shown Figure Download Walled Garden.