
This chapter describes how to configure the Aruba Controller.
Before proceeding further with the configuration, you need to configure Wi5stars with a domain and a gateway, as described in Adding a New Gateway.
The prerequisites required for configuration are:
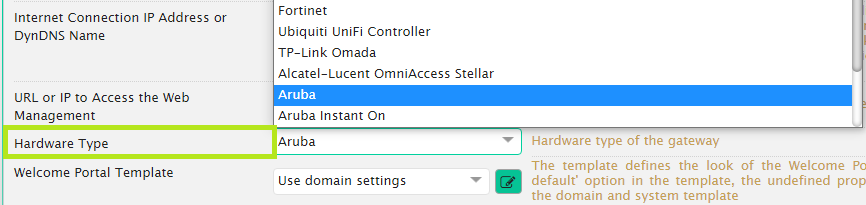
Inside Wi5stars, select your gateway, click the dropdown menu, and choose Edit.
Expand the General Data session.
In the Hardware Type field, choose Aruba.
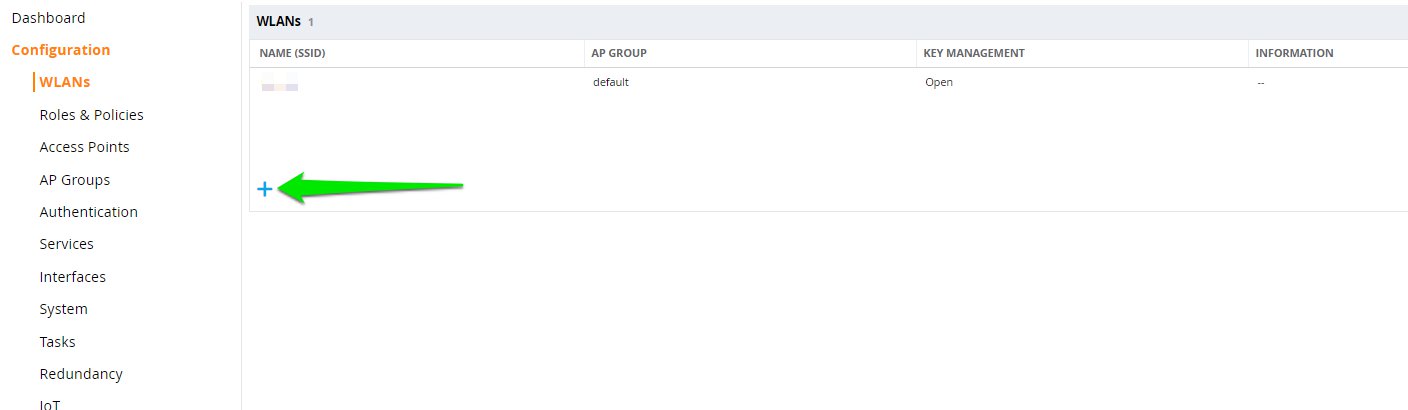
From the Configuration menu on the left, click WLANs and then click + to add a new WLAN.
Complete the General session as follows:
Type the SSID name.
In the Primary usage field, select Guest.
In the Forwarding Mode, select Tunner.
Now click on Next.

Now select the number of VLANs that you need.
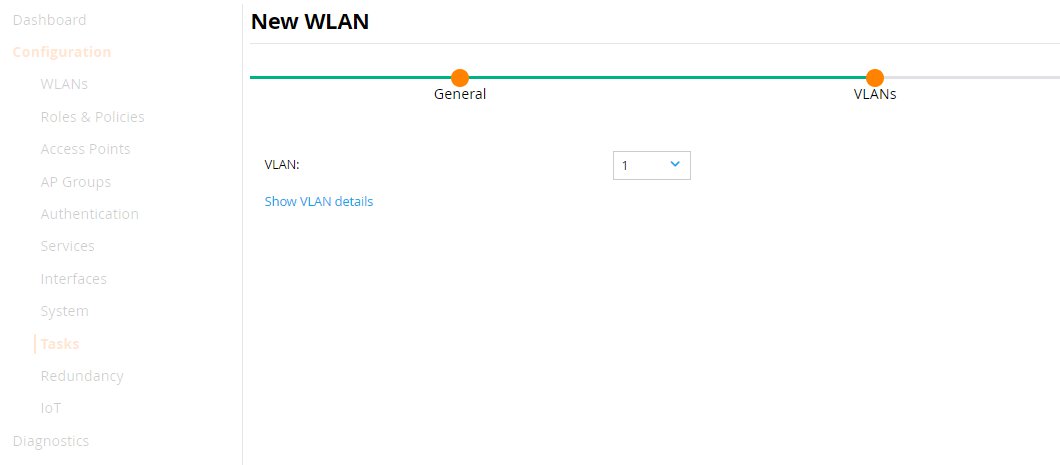
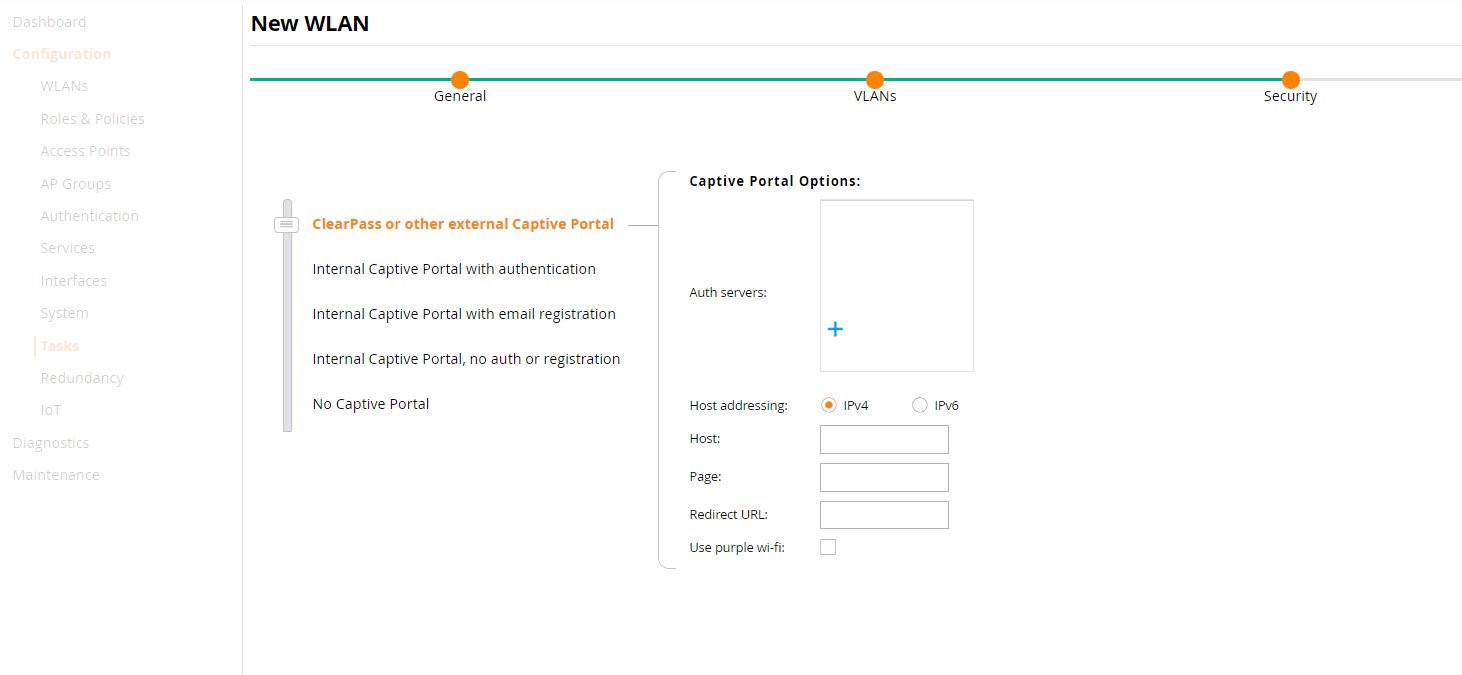
Now you need to move to the Security session.
Select the Select ClearPass or other external Captive Portal menu.
In the Auth servers field, click + and then + again to create e new server.
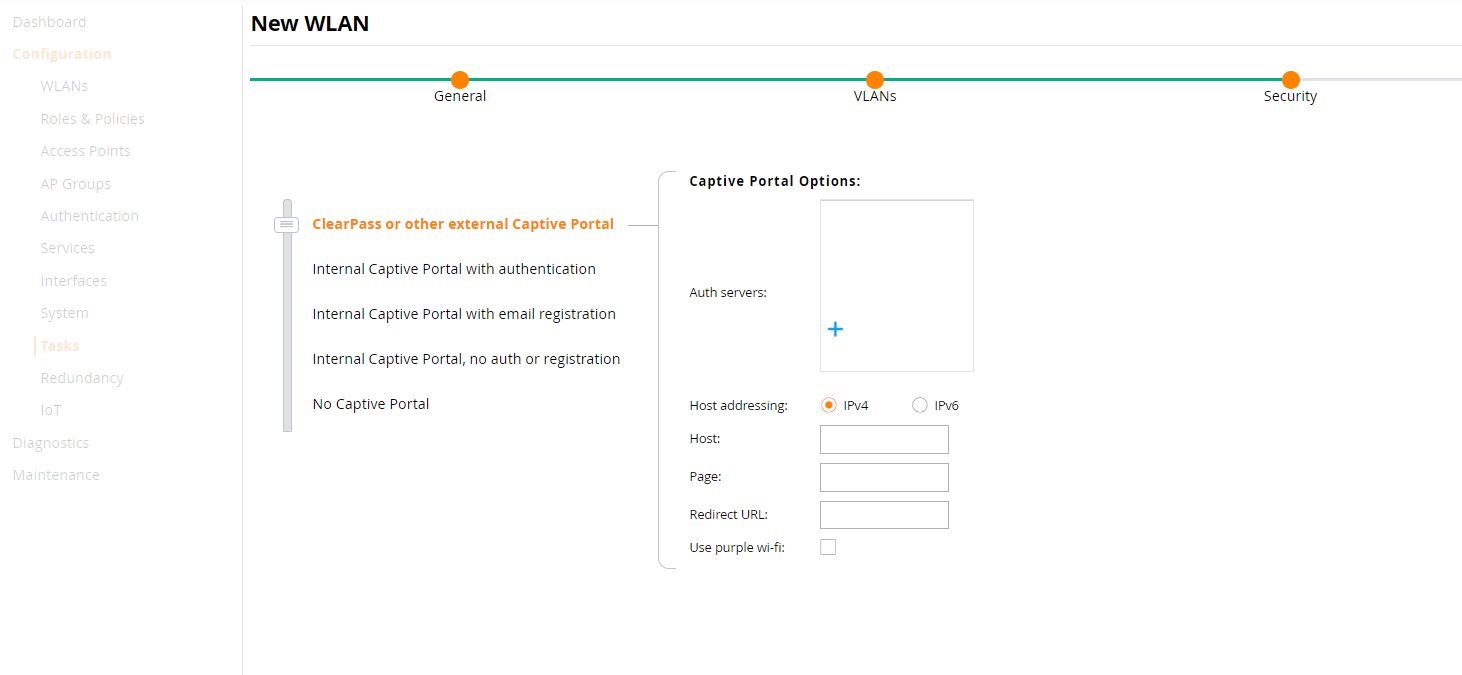
Select RADIUS. Now configure with:
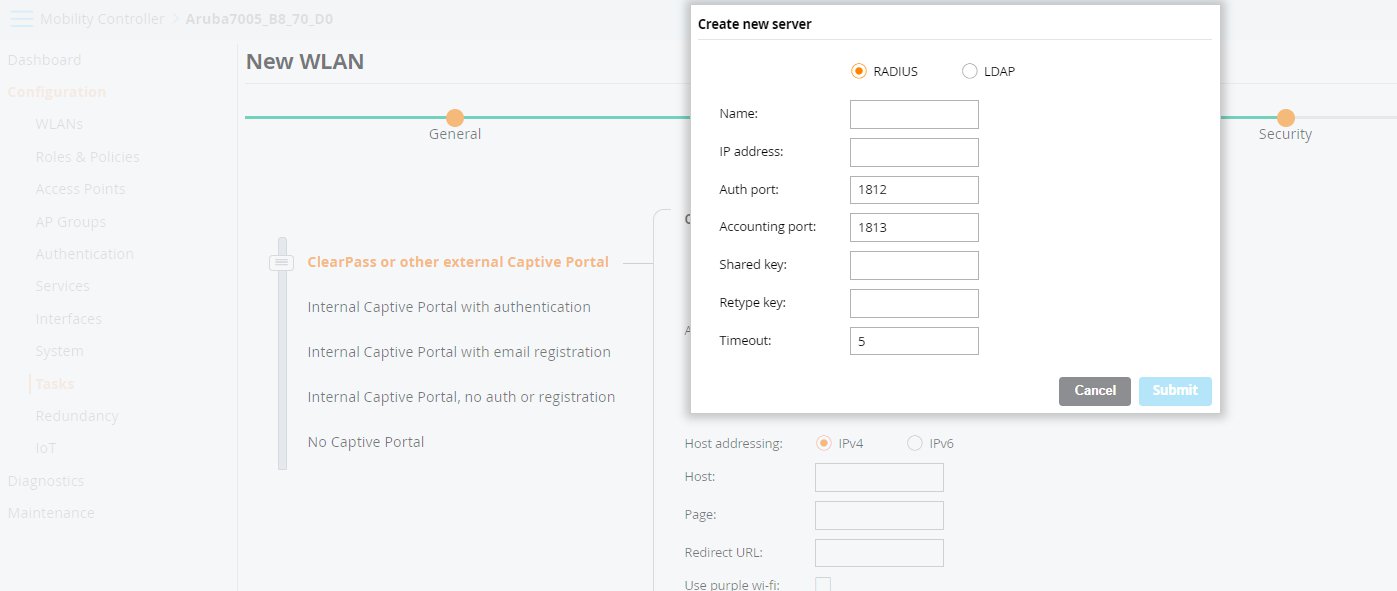
In the Shared key and Retype key fields, enter your Wi5stars Radius secret.
In order to add the Secret you need to get it from your Wi5stars as described in the Radius Secret paragraph.
Click Submit to save the entries.
Now in the Host addressing field, select “IPv4” and configure with:
Click Next and then Finish.
Select the Roles & Policies menu on the left and click on the Aliases tab.
Click the + button under the Network Aliases section.
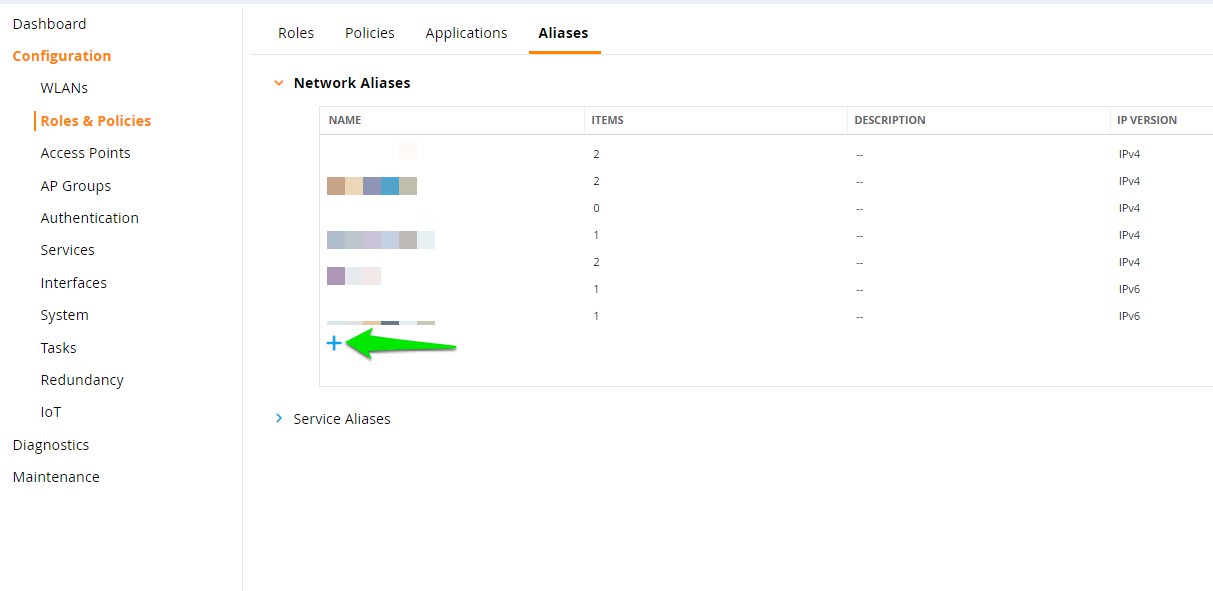
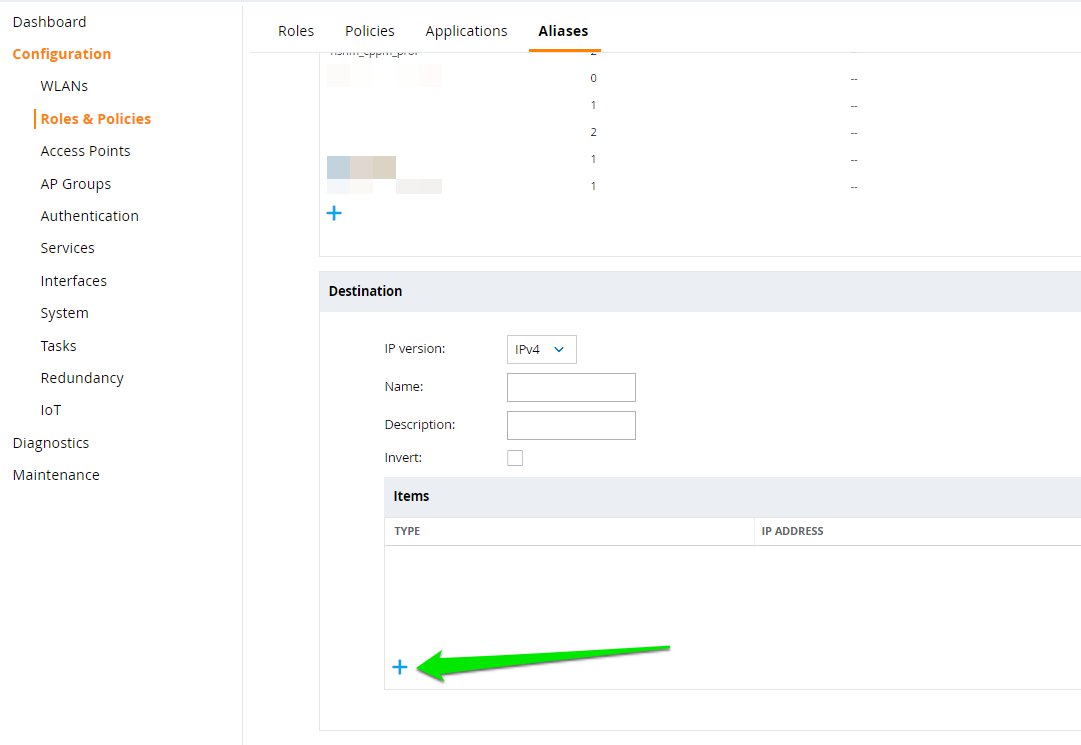
The Destination section will appear.
In the IP version field, select IPv4.
Now, enter the name in the Name field.
Click on the + button under the Items section.
Download the walled garden list from Wi5stars.
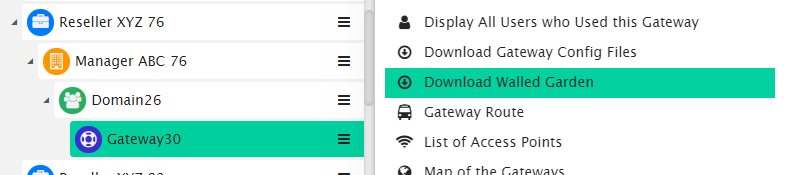
To know the accurate and relevant Walled Garden, you need to add one by one, access your v platform and click the contextual dropdown menu of your gateway. Then, select Download Walled Garden to get a .txt file with your accurate walled garden list, as shown in Figure Download Walled Garden.
From the left menu, click Authentication, then select the L3 Authentication tab.
Then click and expand Captive Portal Authentication Profile.
Select your SSID name “cppm_prof” profile.
Now configure with:
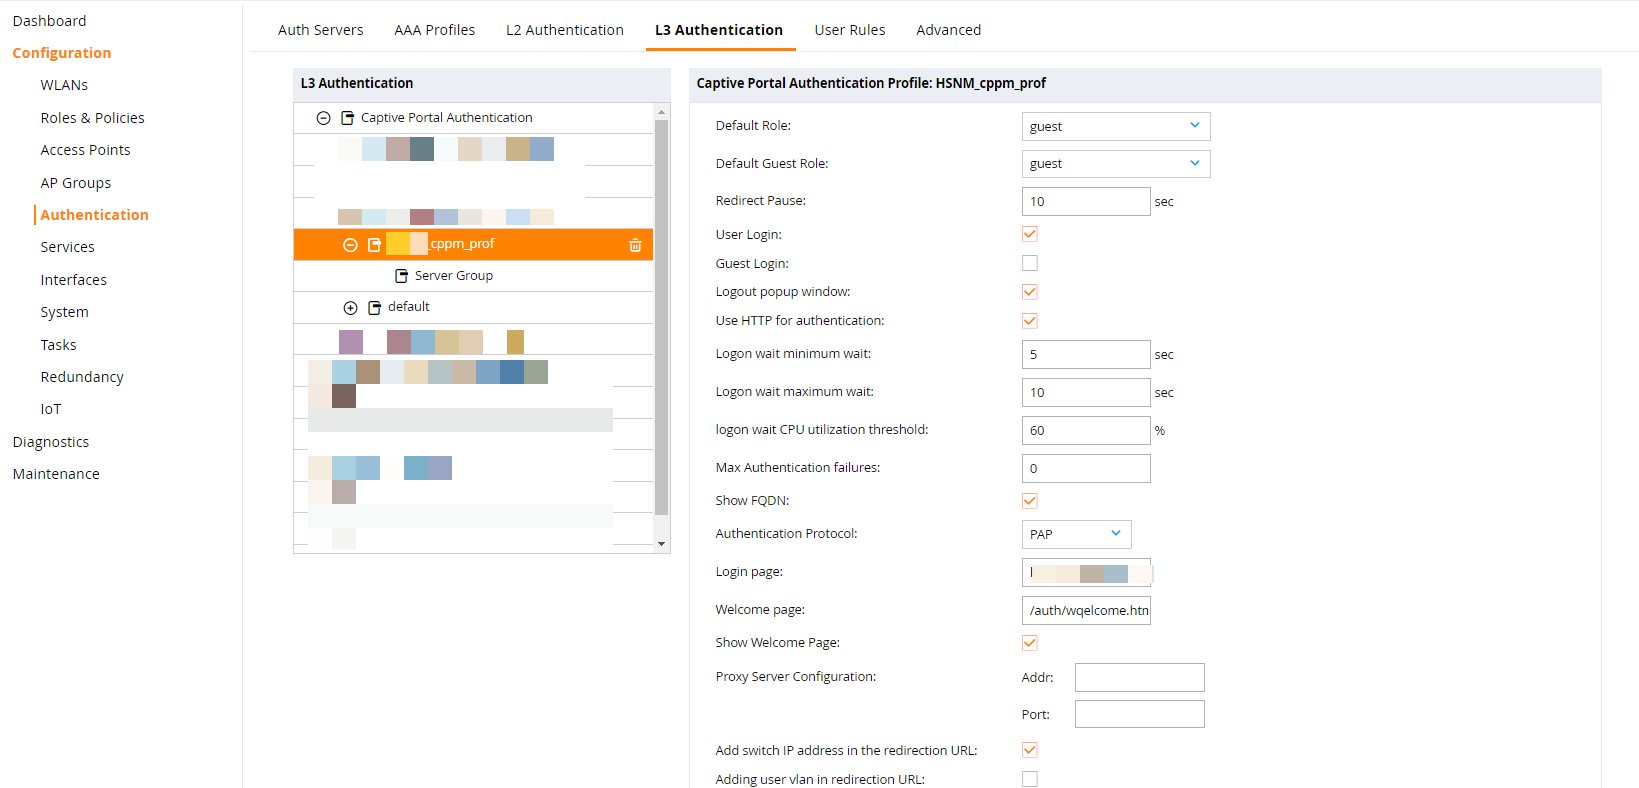

Click Submit to save the entries.
To deploy changes, click Pending Changes on the top right corner.
We suggest repeating the step every time the message Pending Changes appears.

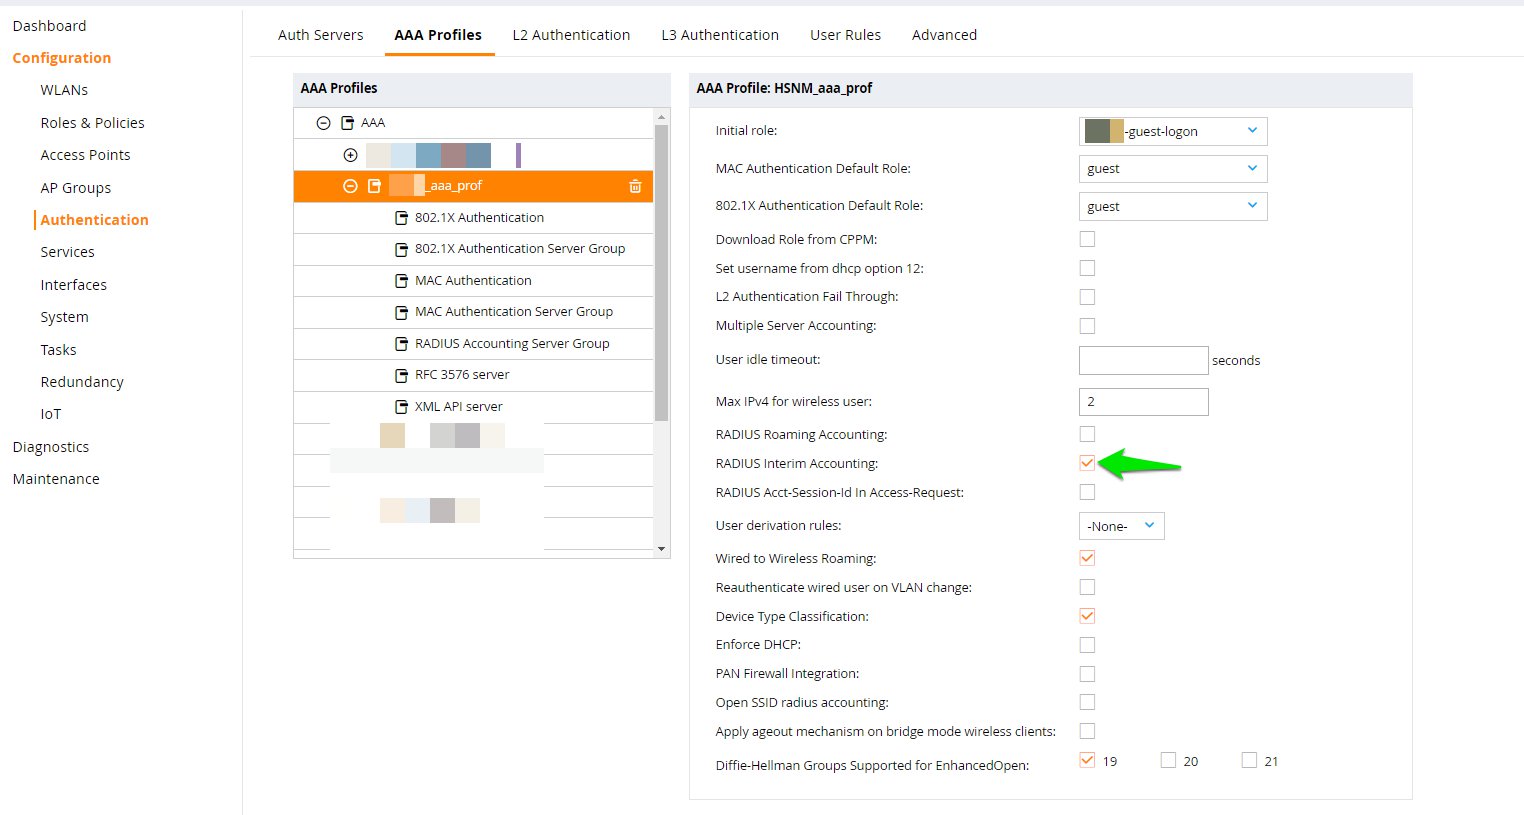
Select the AAA Profiles tab at the top.
Select your SSID NAME_aaa_prof profile.
Enable the RADIUS Interim accounting field.
Save the entry.
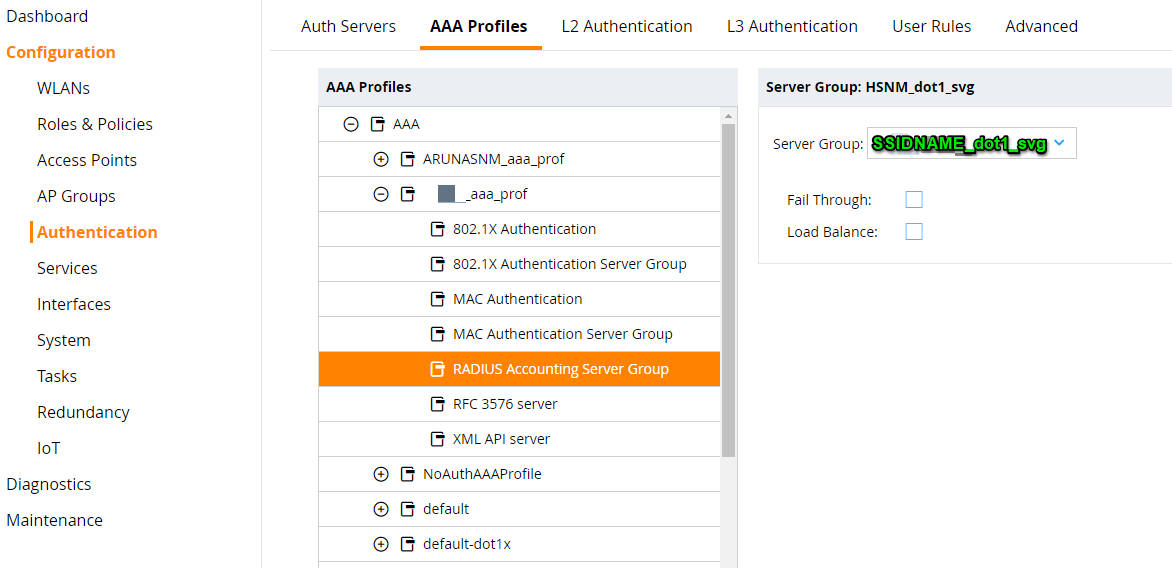
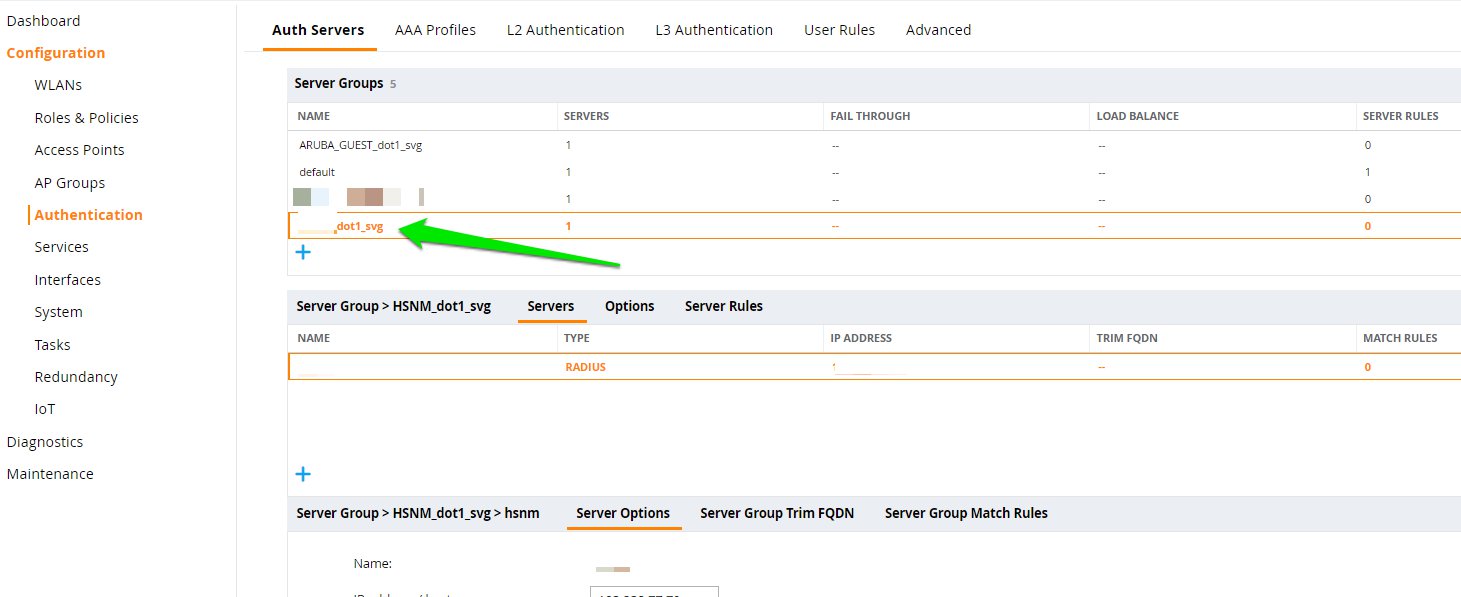
From the left AAA Profiles section, expand your SSID NAME_aaa_prof profile and select RADIUS Accounting server Group.
In the Server Group field, select YOURSSIDNAME_dot1_svg.
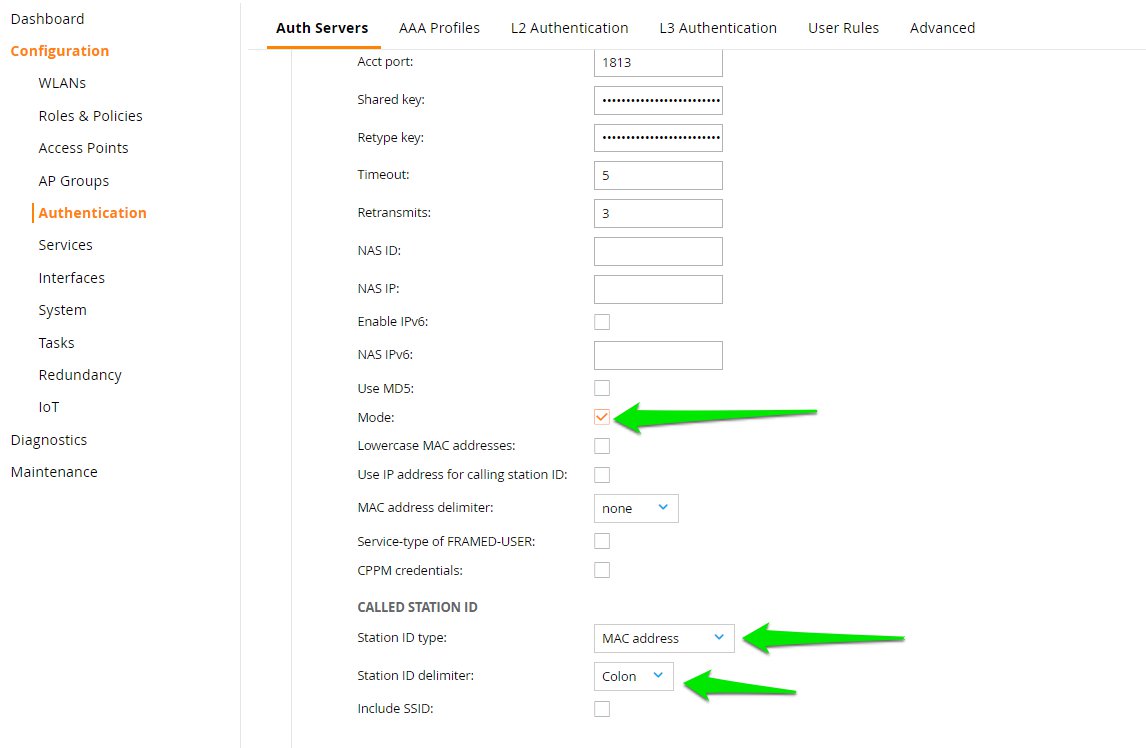
Select the Auth Servers tab at the top.
Select the Radius name created earlier.
Flag the Mode field.
In the Station ID Type field, select MAC address.
In the Station ID delimiter field, select Colon.
You completed the Aruba configuration. If HTTPS is required, proceed with the next step (which is optional) to install a valid certificate.
If HTTPS is required, you need to upload a valid certificate and make the SSL-issued FQDN point to the controller.
From the left menu, click Configuration>System>Certificates.
Click on + to add a valid certificate.

Type a Name for your certificate.
In the Certificate Type field, select ServerCert. Then click on Browse to upload your valid certificate.
Click on the Submit button.
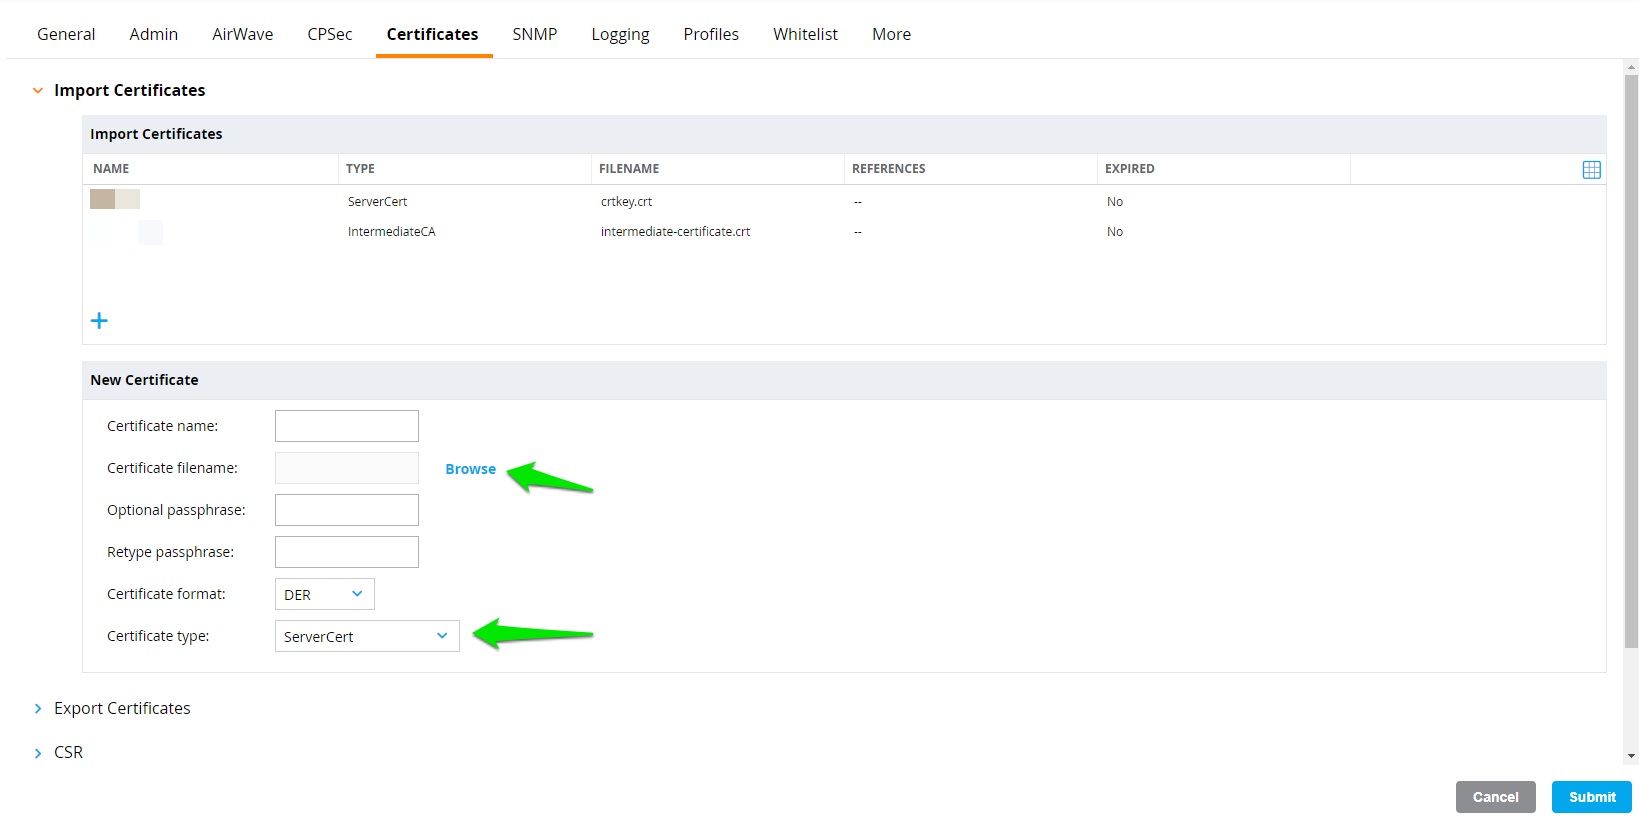
Now click again on + to add another certificate.
Type a Name and select Intermediate CA as certificate type.
Click on Browse to upload your valid certificate, then click Submit.

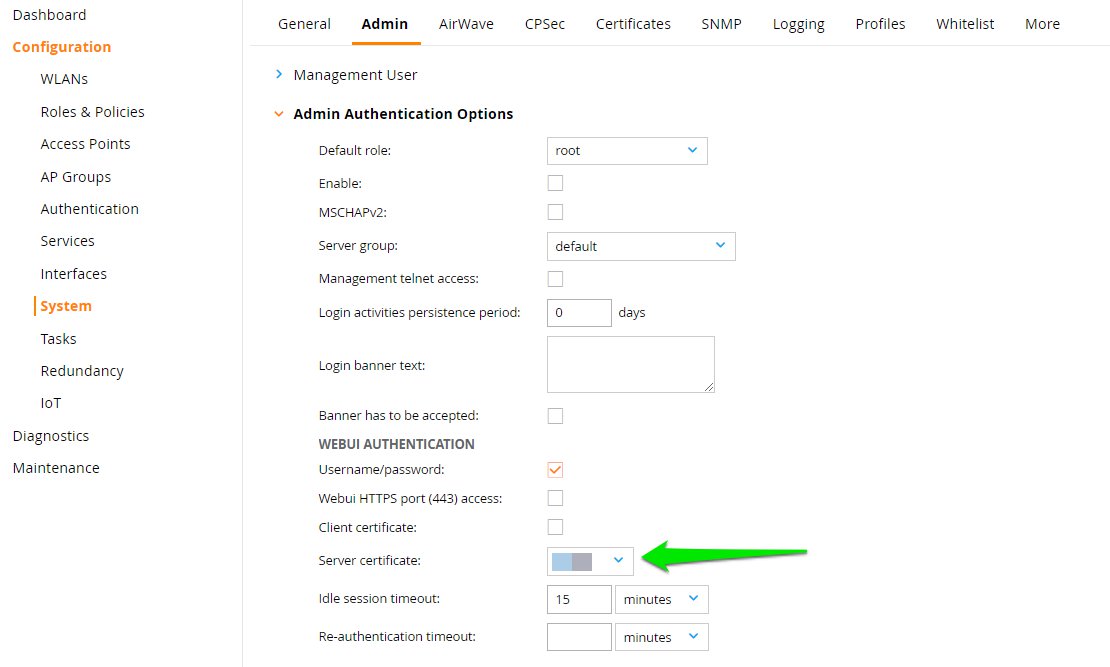
Select the Admin tab at the top.
Under the WEBUI AUTHENTICATION section, you can select the certificate you uploaded. In the Server certificate field, select your certificate.
Edit your “SSIDname_cppm_prof” profile by adding the HTTPS URL.
Once you have set all the steps described above, you will get your Aruba Controller configured and ready to work with Wi5stars.